-
Carefully lift the rack using oven mitts.
-
Place it in the preheated oven, ensuring stable positioning.
-
Close oven door and allow heat to envelop the rack evenly.
-
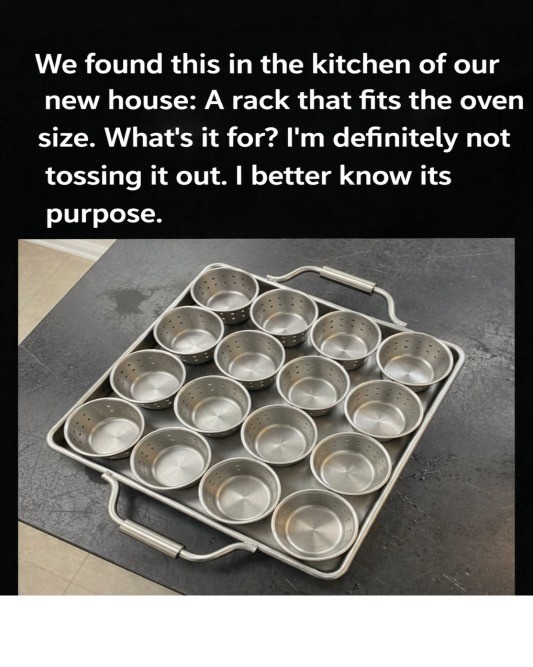
If the rack is too big for the oven:
-
Use it as a vertical cooling rack for baked goods.
-
Repurpose as a multi-tier dehydrator for herbs, fruits, or jerky.
-
Stack trays on tabletop using the rack as a marination station.
-
Tip: The versatility of the rack turns puzzlement into creative culinary options.
Step 6: Cooking or Dehydration Process
-
Roast vegetables for 25–35 minutes, checking midway.
-
Proteins may require 20–45 minutes depending on size and type—use a thermometer for safety (165°F / 74°C for chicken, 145°F / 63°C for fish).
-
Rotate trays if necessary to ensure even browning or drying.
-
For multi-tray setups, observe airflow; adjust spacing if some trays cook faster.
Note: The large rack allows simultaneous batch cooking, saving energy and reducing time.
Step 7: Optional Rack Experiments
-
Vertical Marination: Stack trays with fish, tofu, or marinated vegetables, allowing juices to drip and flavor layers to interact.
-
Dehydration: Use oven at low temperature (140–160°F / 60–70°C) to slowly dry herbs, fruits, or vegetables.
-
Cooling Rack for Bakes: Post-baking, move hot trays directly onto rack tiers for even cooling, reducing sogginess.
-
Steam Layering: Place a tray with water at bottom and vegetables above for indirect steaming—experiment with texture variations.
Tip: This is the “puzzle-solving” stage, letting curiosity dictate culinary creativity.
Step 8: Taste-Test and Adjust
-
After cooking, remove rack safely using oven mitts.
-
Taste each tray for seasoning, tenderness, and flavor balance.
-
Adjust by:
-
Adding more salt or herbs
-
Drizzling extra oil or melted butter
-
Briefly returning under heat for crispness
-
Tip: The unusual rack allows multitasking; taste testing ensures every tier meets culinary standards.
Step 9: Serving Suggestions
-
Serve roasted vegetables as a colorful platter.
-
Plate proteins directly from trays; drizzle with pan juices.
-
For multi-tiered meals, use each tray as a course—vegetables first, proteins next, garnished with fresh herbs.
-
Leftovers can remain on rack for storage in refrigerator, stacking trays efficiently.
Tip: Presentation gains impact when you embrace the unusual rack’s size and layout.
Step 10: Optional Culinary Variations
-
Dessert Trays: Bake cookies, brownies, or sheet cakes on separate tiers—rack accommodates multiple batches at once.
-
Herb Dehydration: Use top racks for herbs; bottom for fruits—vertical layering optimizes airflow.
-
Slow-Roast Meats: Stack trays of seasoned meats at low temperature for 4–6 hours; juices collect in bottom tray for gravies or sauces.
-
Marination Staging: Use the rack to hold multiple marinating trays in a fridge—efficient for meal prep or catering.
Note: Treat the rack as an experimental station; its size and design are limited only by imagination.

Leave a Comment